
Install Portainer and Ghost (Portainer Landscape Part 1/3)
Deploy the ghost CMS via portainer
If you did not read the last post, please do so.
Introduction
In this tutorial, we will guide you through the process of deploying the Ghost CMS using Portainer. Portainer is a widely used open-source platform that simplifies the management of Docker containers through a user-friendly web interface. By utilizing Portainer, you can effectively manage and monitor your containerized applications without the need for extensive Docker expertise.
Requirements
To follow this tutorial, you will need the following prerequisites:
- Docker
- Docker Compose
- Git bash
Demo
Benefits of Using Portainer
Portainer offers several advantages over managing Docker containers directly from the command line:
- User-friendly interface: Portainer provides a straightforward and intuitive web interface that makes it easy to browse, manage, and monitor your containers.
- Simplified container management: Portainer simplifies various container management tasks, including starting, stopping, restarting, and scaling containers.
- Centralized control: Portainer enables centralized control over your containerized applications, allowing you to manage multiple containers from a single location.
Suitability of Portainer for Different Use Cases
Portainer is a versatile platform that caters to various use cases and user groups:
- Small and Medium-sized Businesses (SMBs): For SMBs, Portainer is an excellent choice for managing containerized applications without the complexities of managing Kubernetes clusters directly. However, Portainer's Business Edition extends its capabilities by allowing you to provision Kubernetes clusters locally or on a wide range of cloud providers, such as Amazon Web Services (AWS), Microsoft Azure, and Google Cloud Platform (GCP). This eliminates the need for SMBs to manually install and configure Kubernetes, making it easier to adopt containerized applications.
- Larger Enterprises: For larger companies with multi-cloud and cluster management needs, Rancher, an open-source platform, is a more suitable option. Rancher provides advanced features specifically designed for managing complex containerized environments.
Install Portainer UI (master node)
To simply deploy, execute the following command in your terminal.
git clone https://github.com/dave-InTheCloud/portainer-landscape-techlovers.git
cd ./portainer-landscape-techlovers/portainer
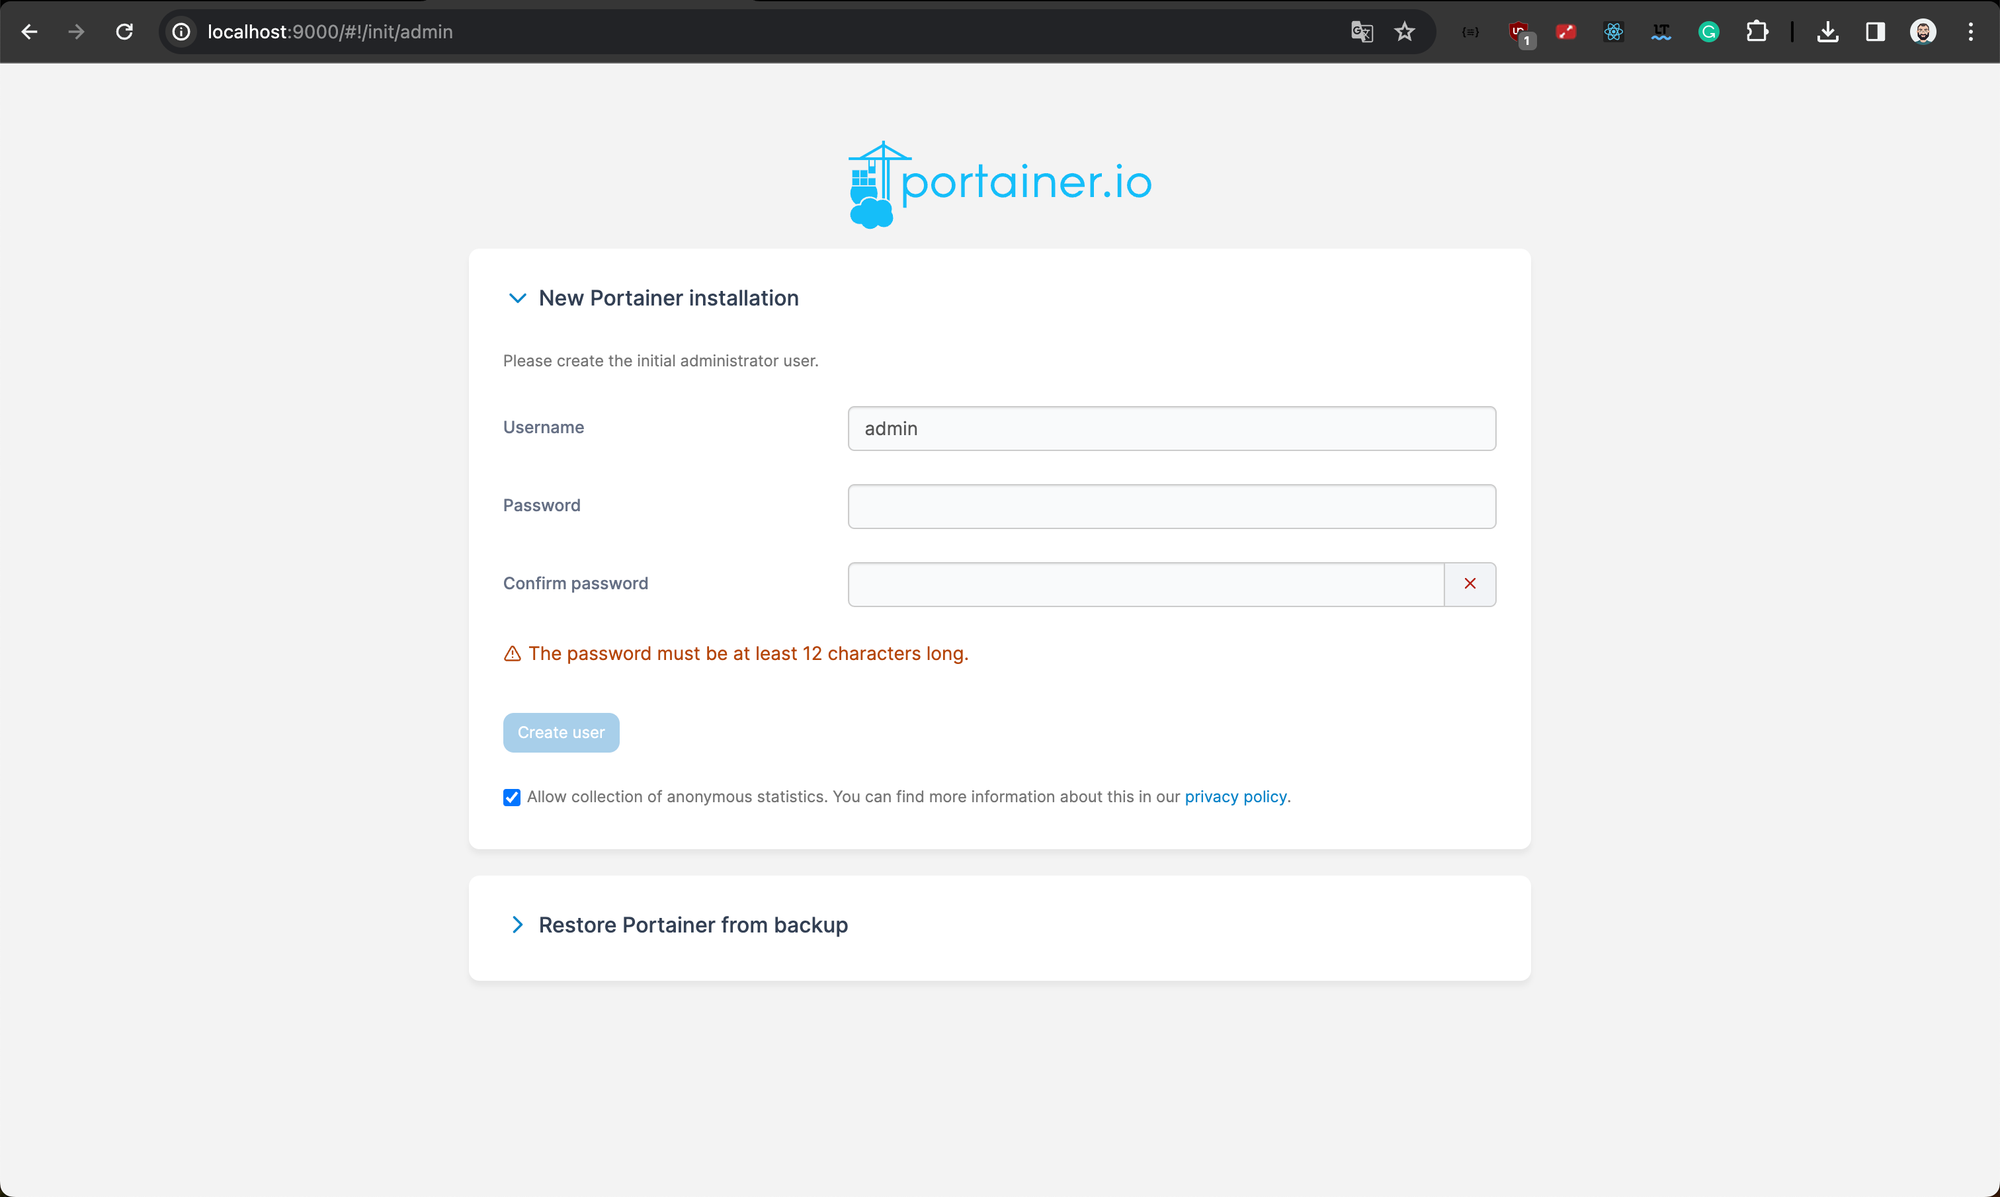
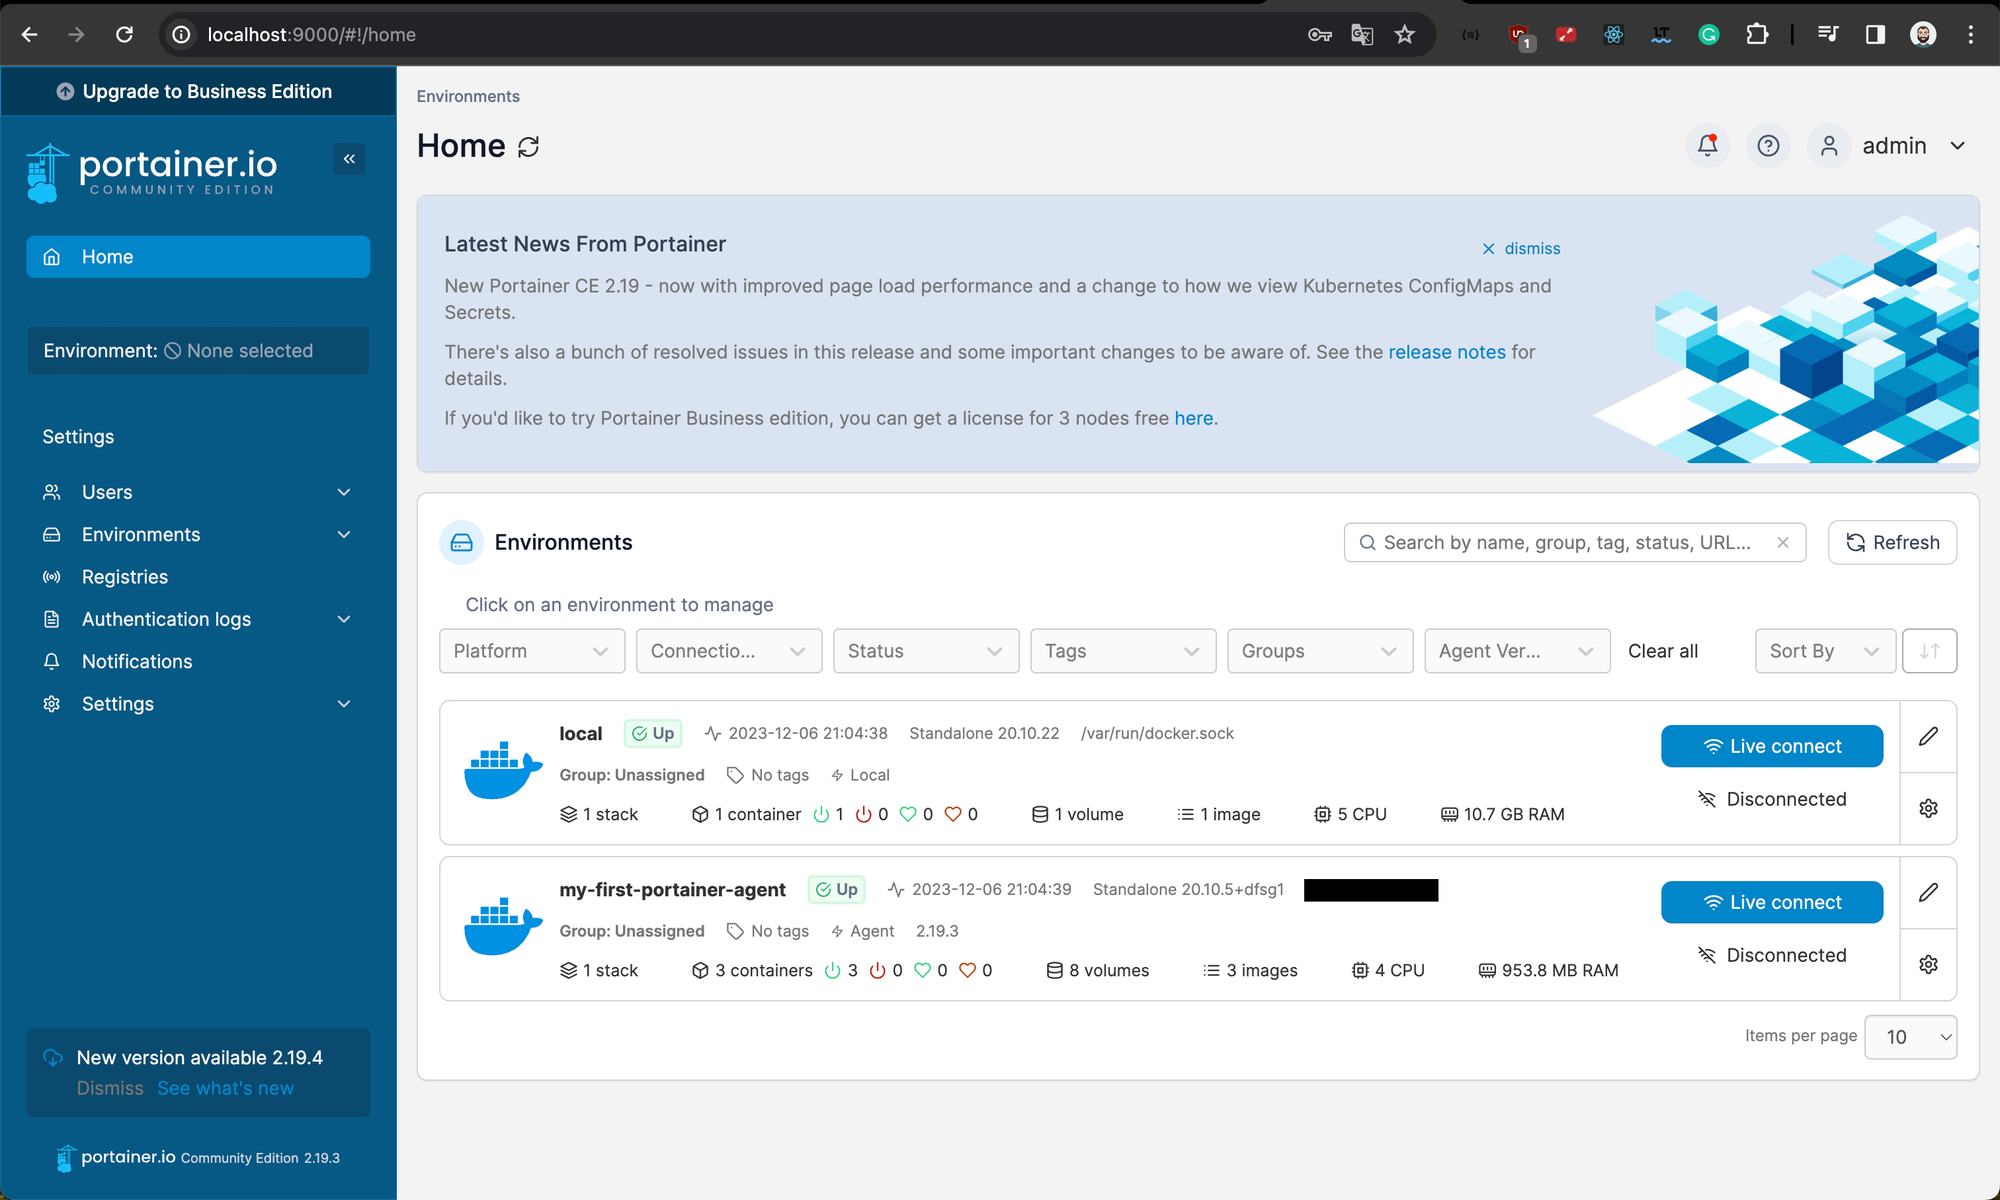
docker-compose up -dYou will now be able to browse and set up your admin user via: http://localhost:9000
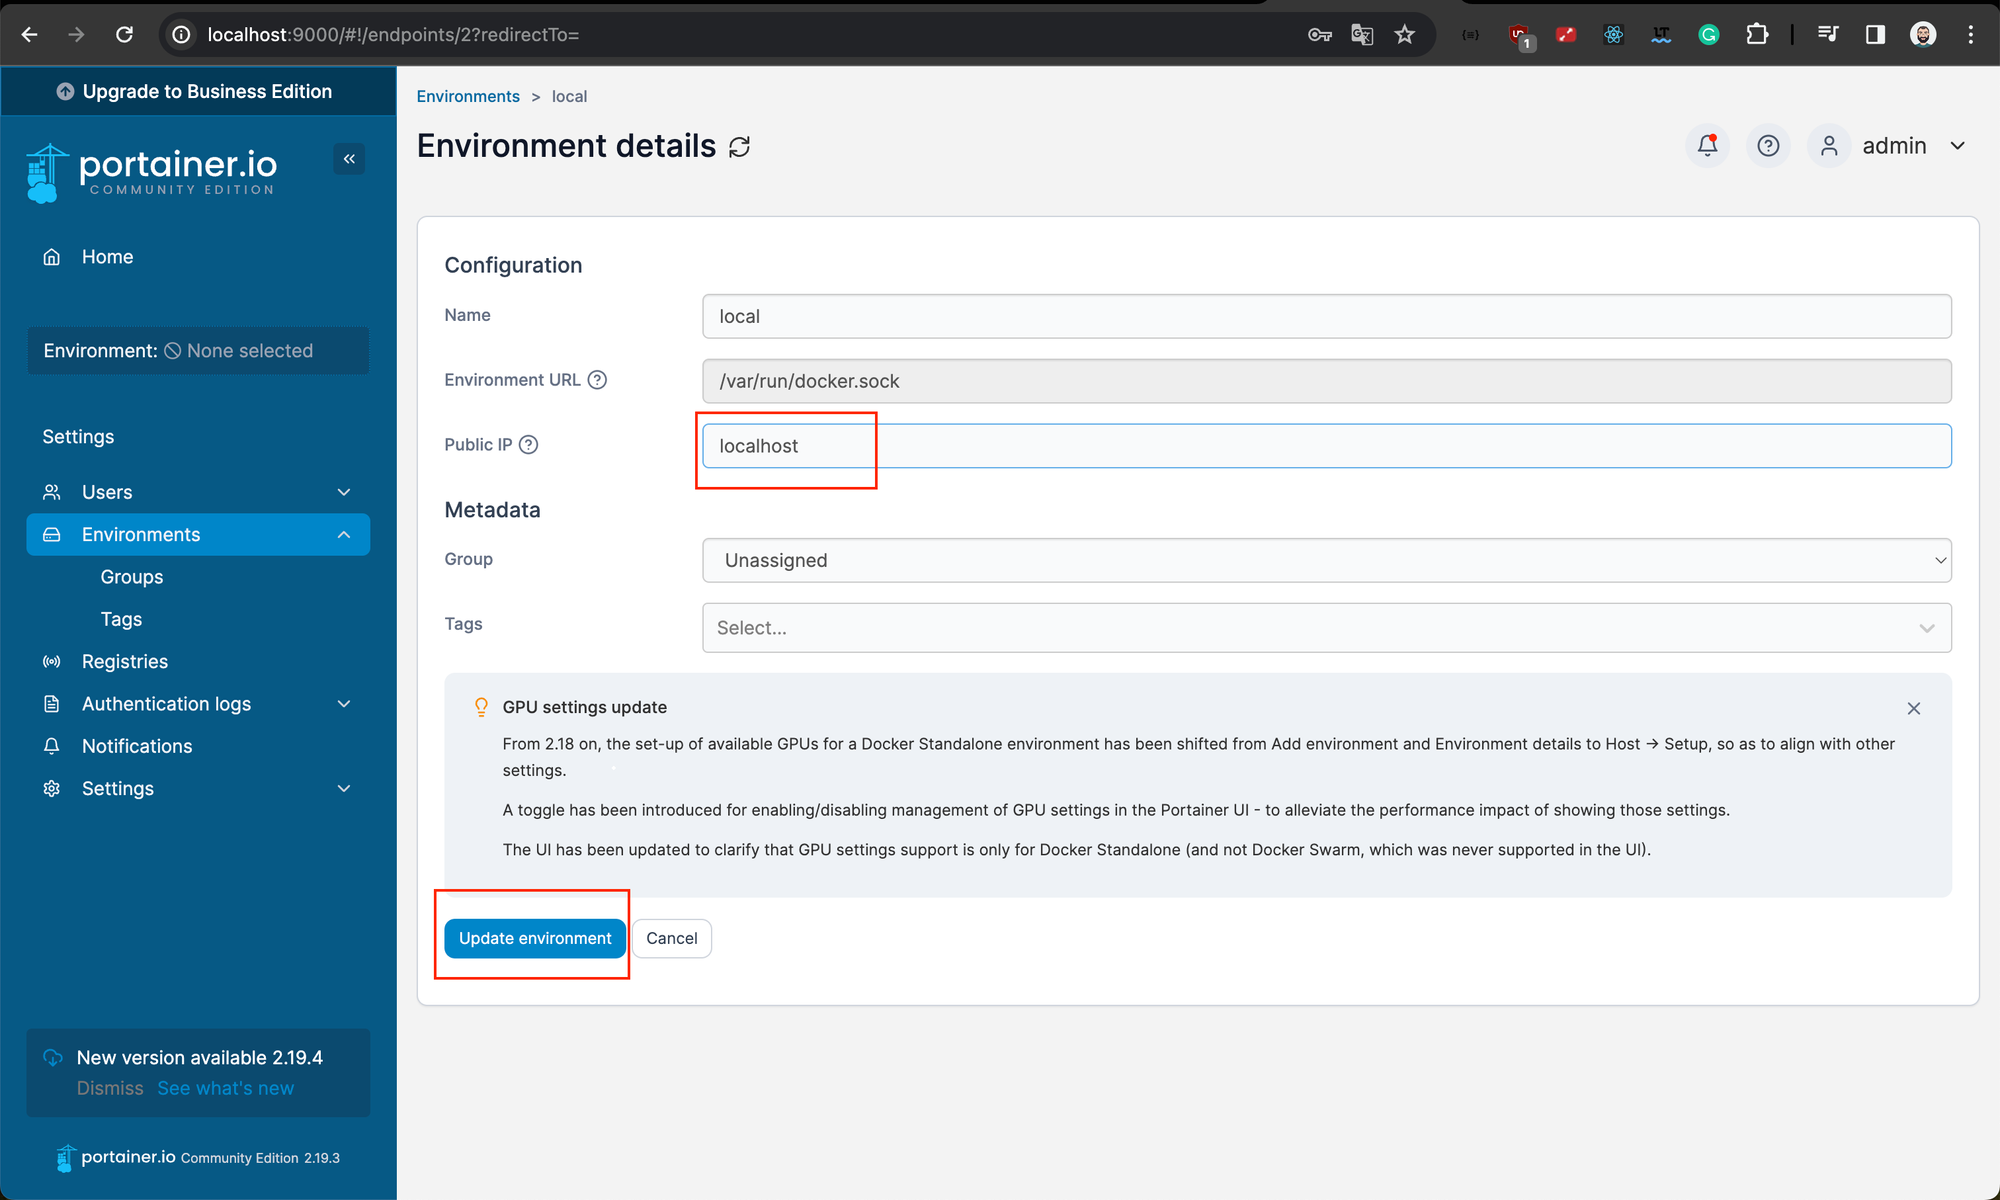
Set the Public IP (localhost or ip) via Settings > Environments > local (it will allow you clicking on an exposed port of a container and to get redirected):
Install Portainer Agent (worker node)
Skip this part if you don't have a second device where to set up the agent
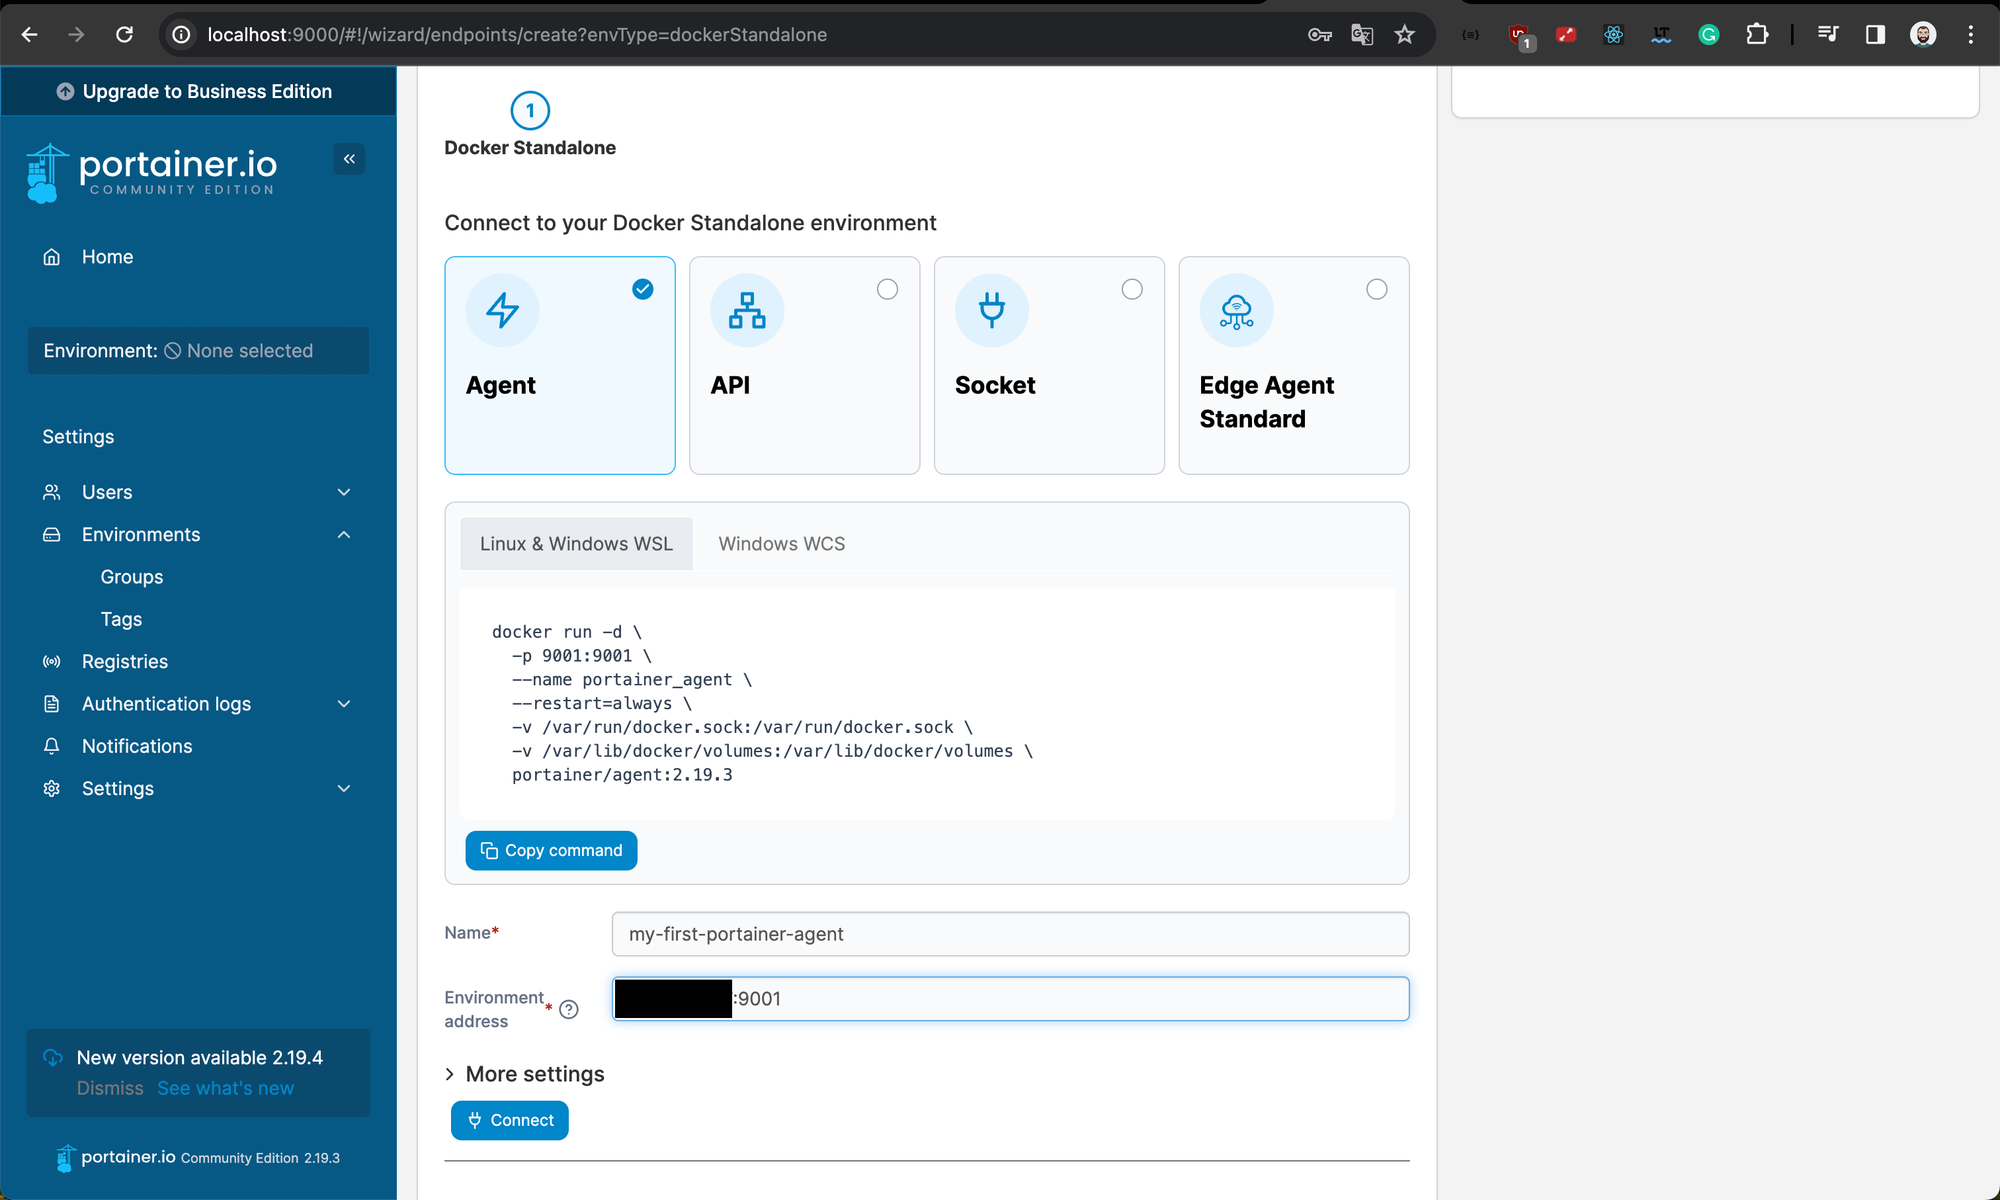
Navigate to Settings > Environments, click Add environment, choose standalone.
Copy the docker run command according to your OS and run it.
Set the name, the IP and the port of the agent device:
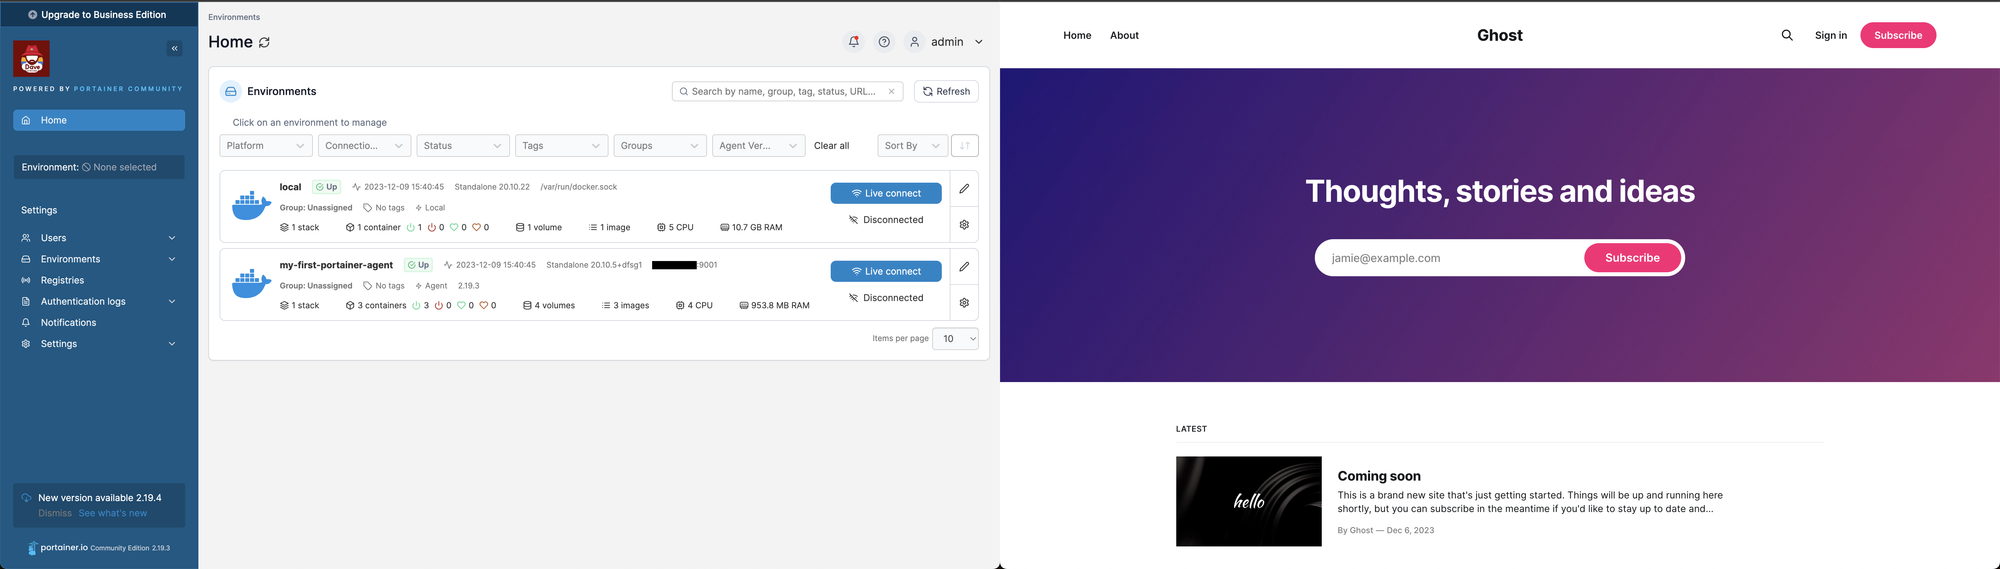
Once you are done, click HOME and you should see your two environment up on the Home page. Click on the environment of your choice to install ghost:
Deploy Ghost CMS and DB
We will now deploy Ghost using custom templates and stacks. (For more detailed explanation, please check here)
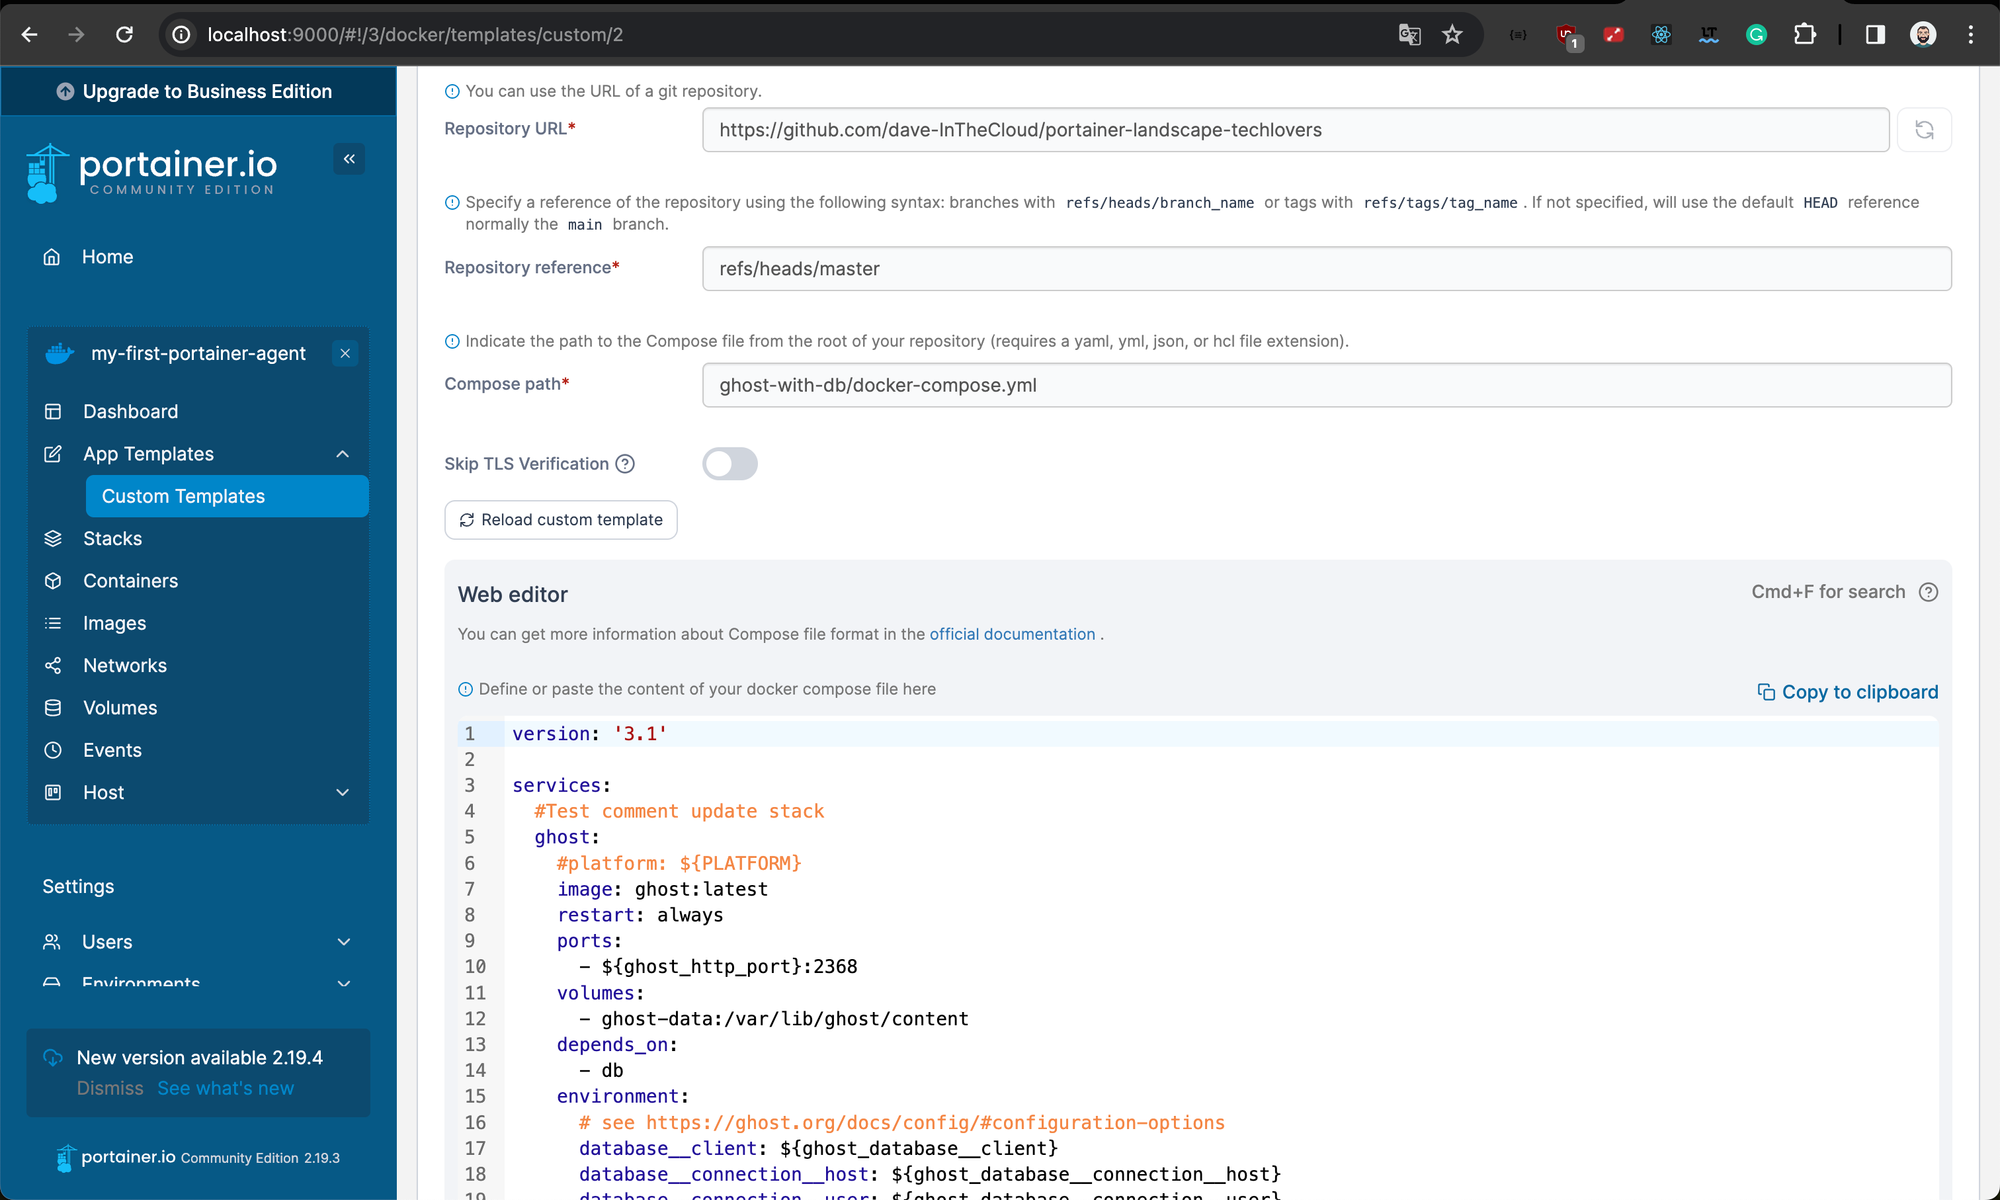
Once you selected the environment, First navigate App Templates > Create custom Templates > Add Custom Template. Choose the name and the description of your choice.
Select Git as build method and put the following data and click Create custom template :
- Repository URL : https://github.com/dave-InTheCloud/portainer-landscape-techlovers
- Repository reference: refs/heads/master
- Compose path: ghost-with-db/docker-compose.yml
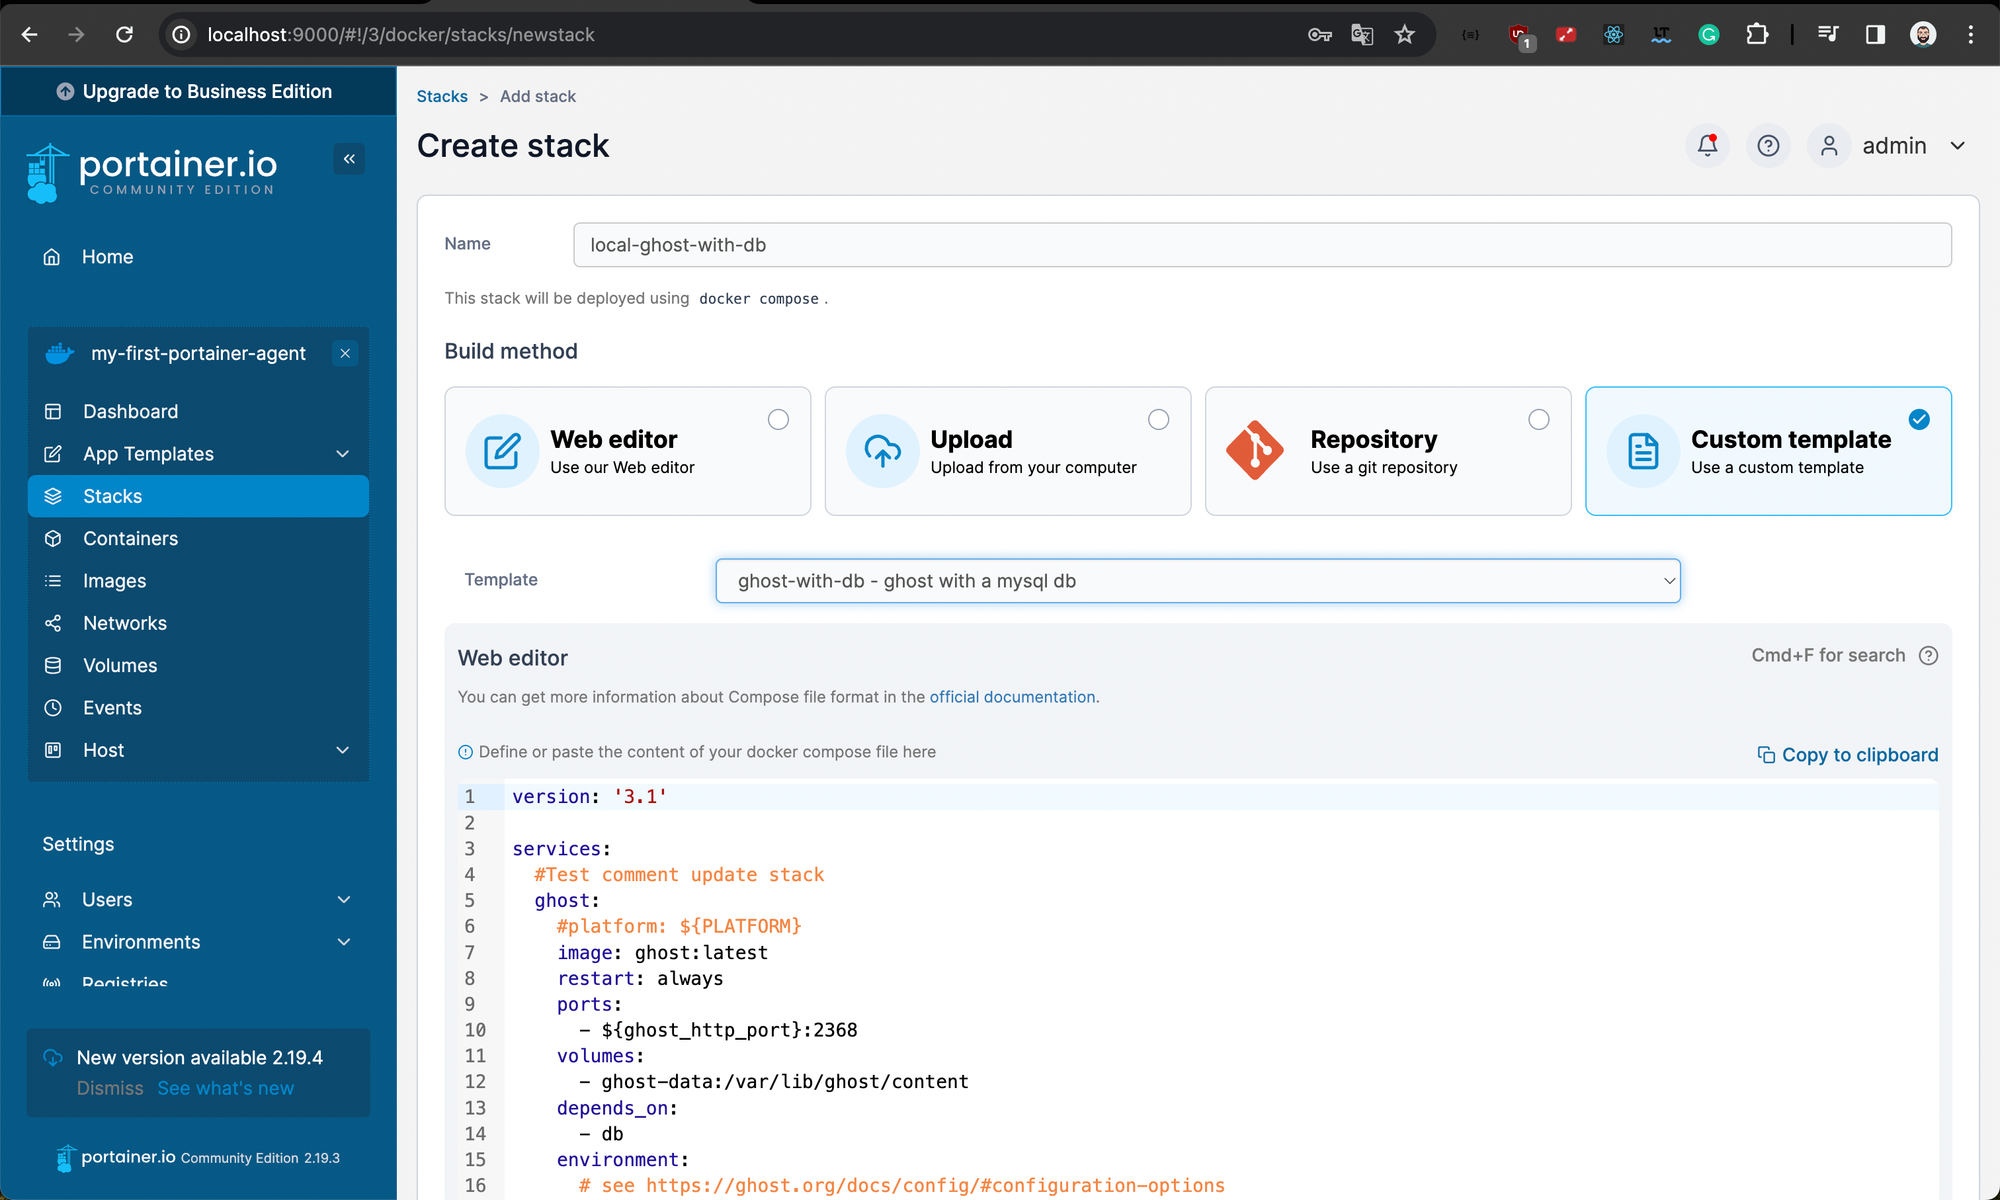
Now that you have created a custom template, you will create a stack from the template. Navigate to Stacks > create custom Templates > Add Custom Template
Scroll down and load the .env file you cloned or download it from this url :
https://github.com/dave-InTheCloud/portainer-landscape-techlovers/blob/master/ghost-with-db/.env
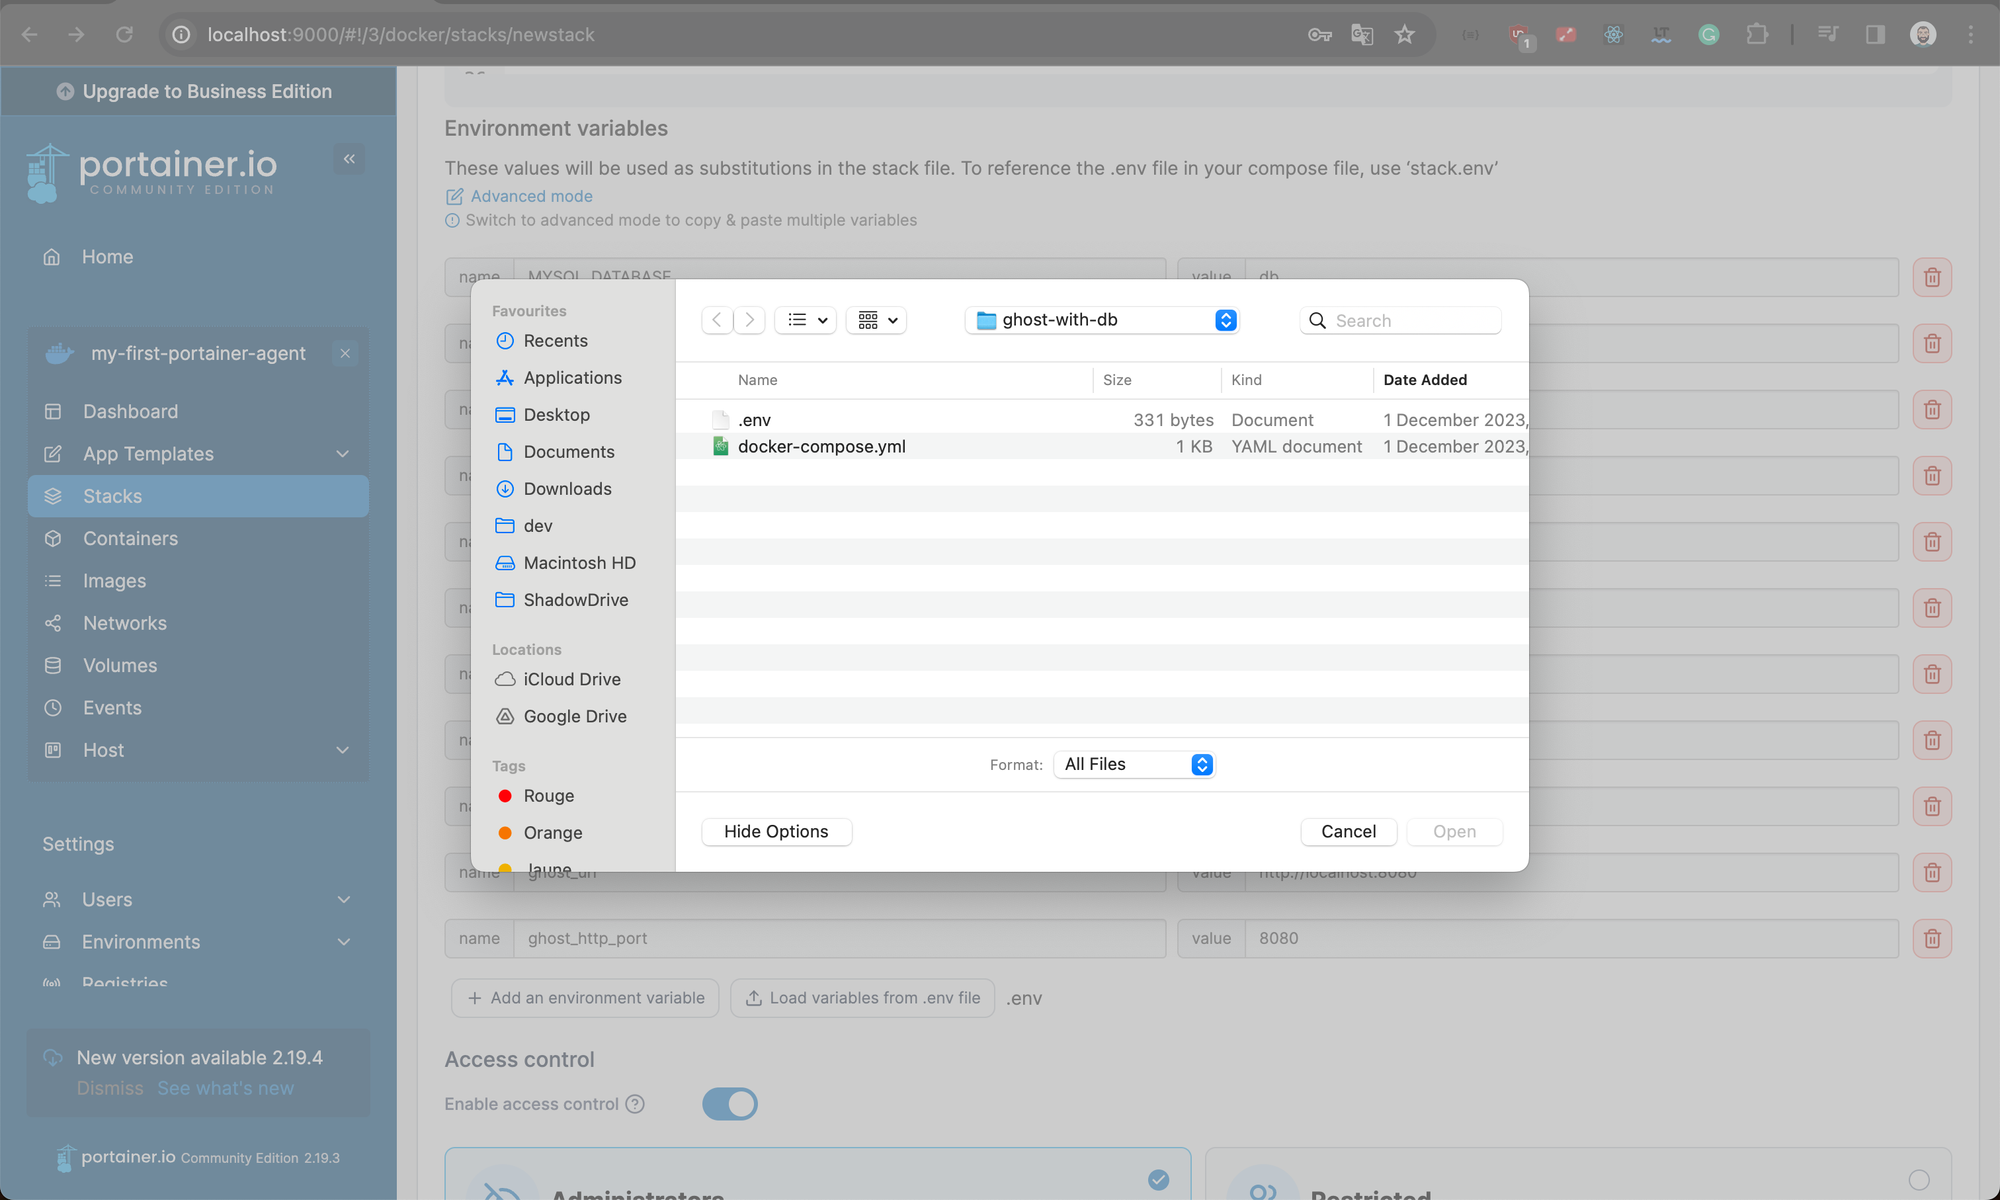
Click deploy, once you are done you should be able to browse your Ghost CMS at
http://YOUR_IP:GHOST_PORT/
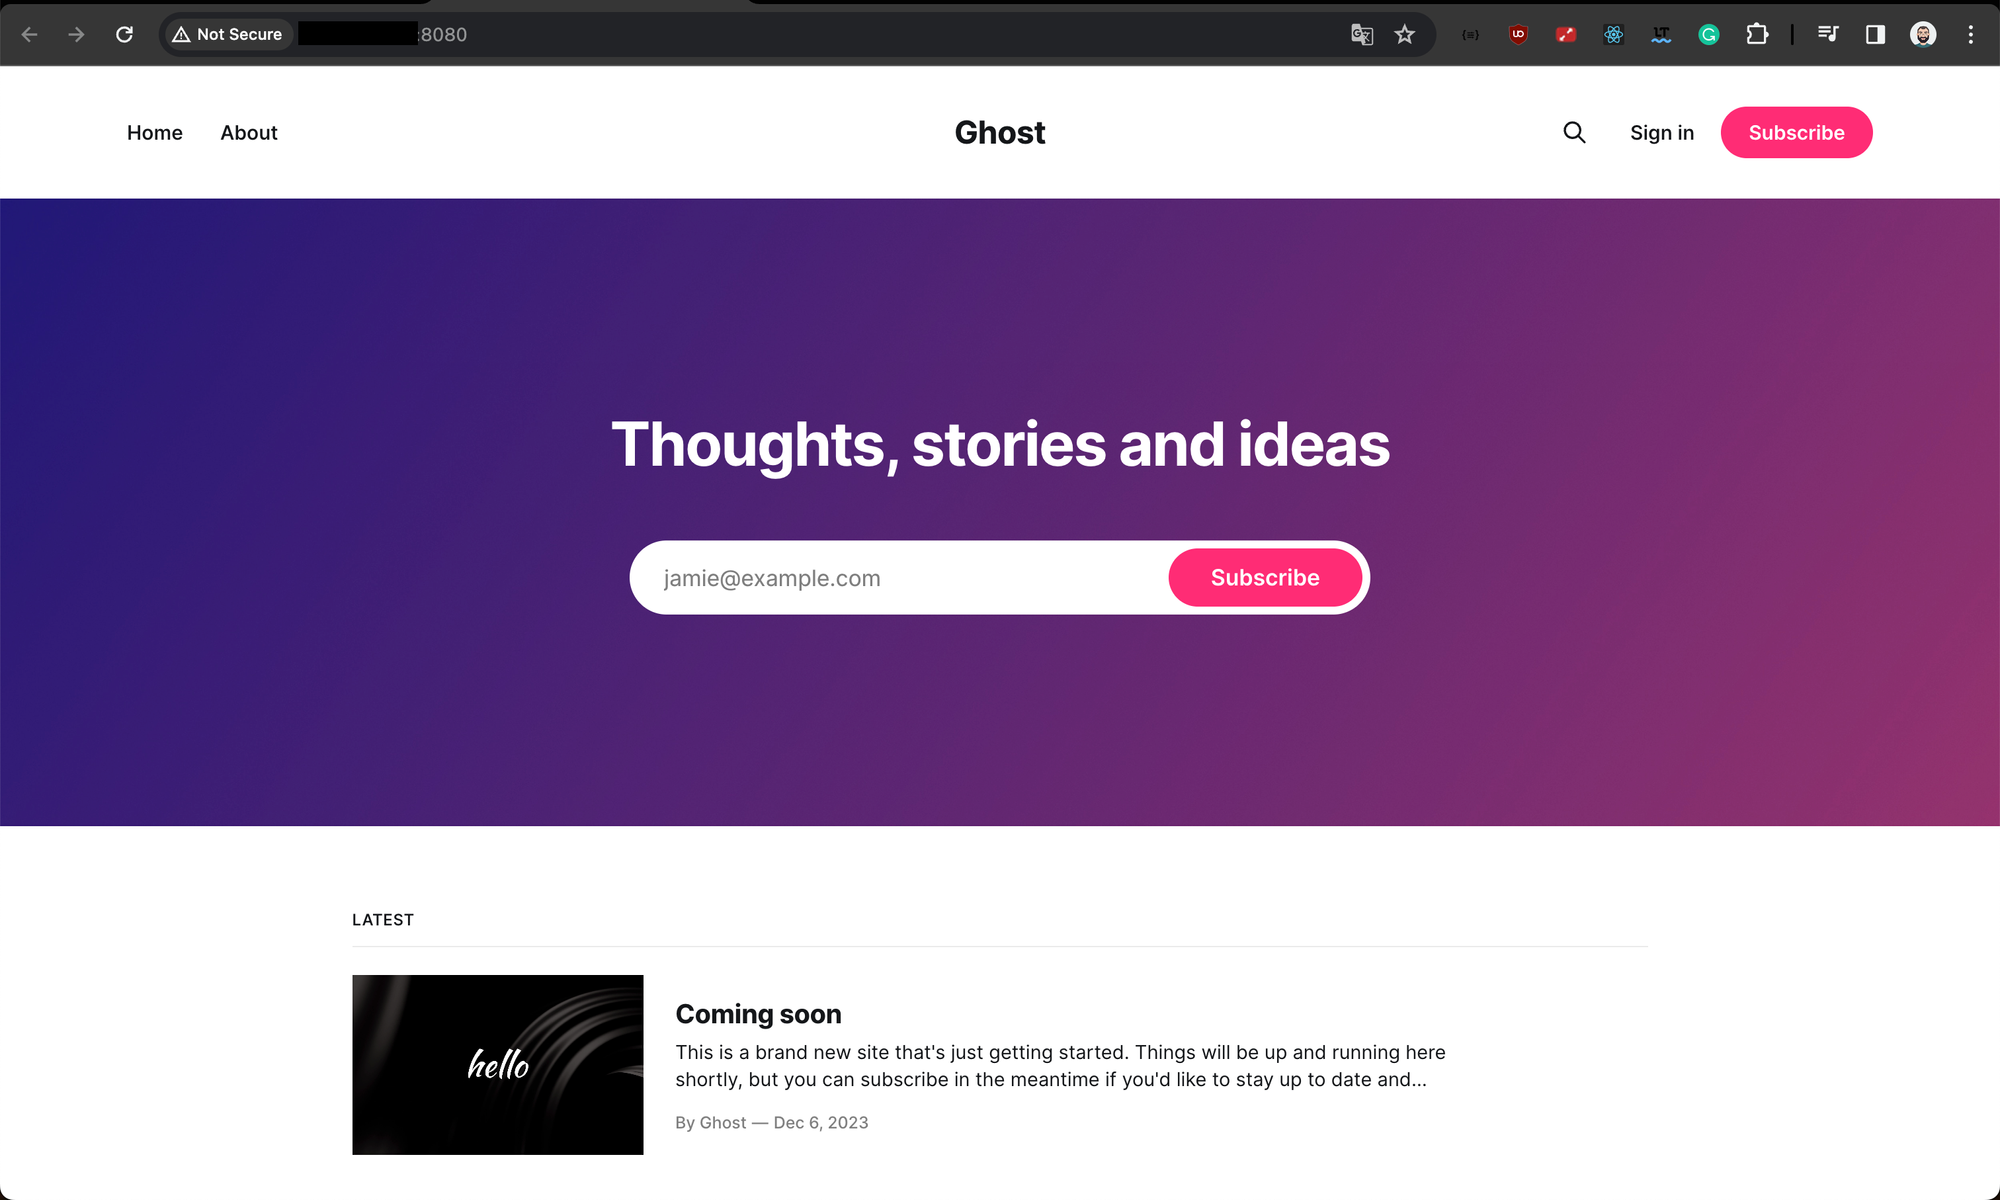
To access the Admin console, go to : http://YOUR_IP:GHOST_PORT/ghost
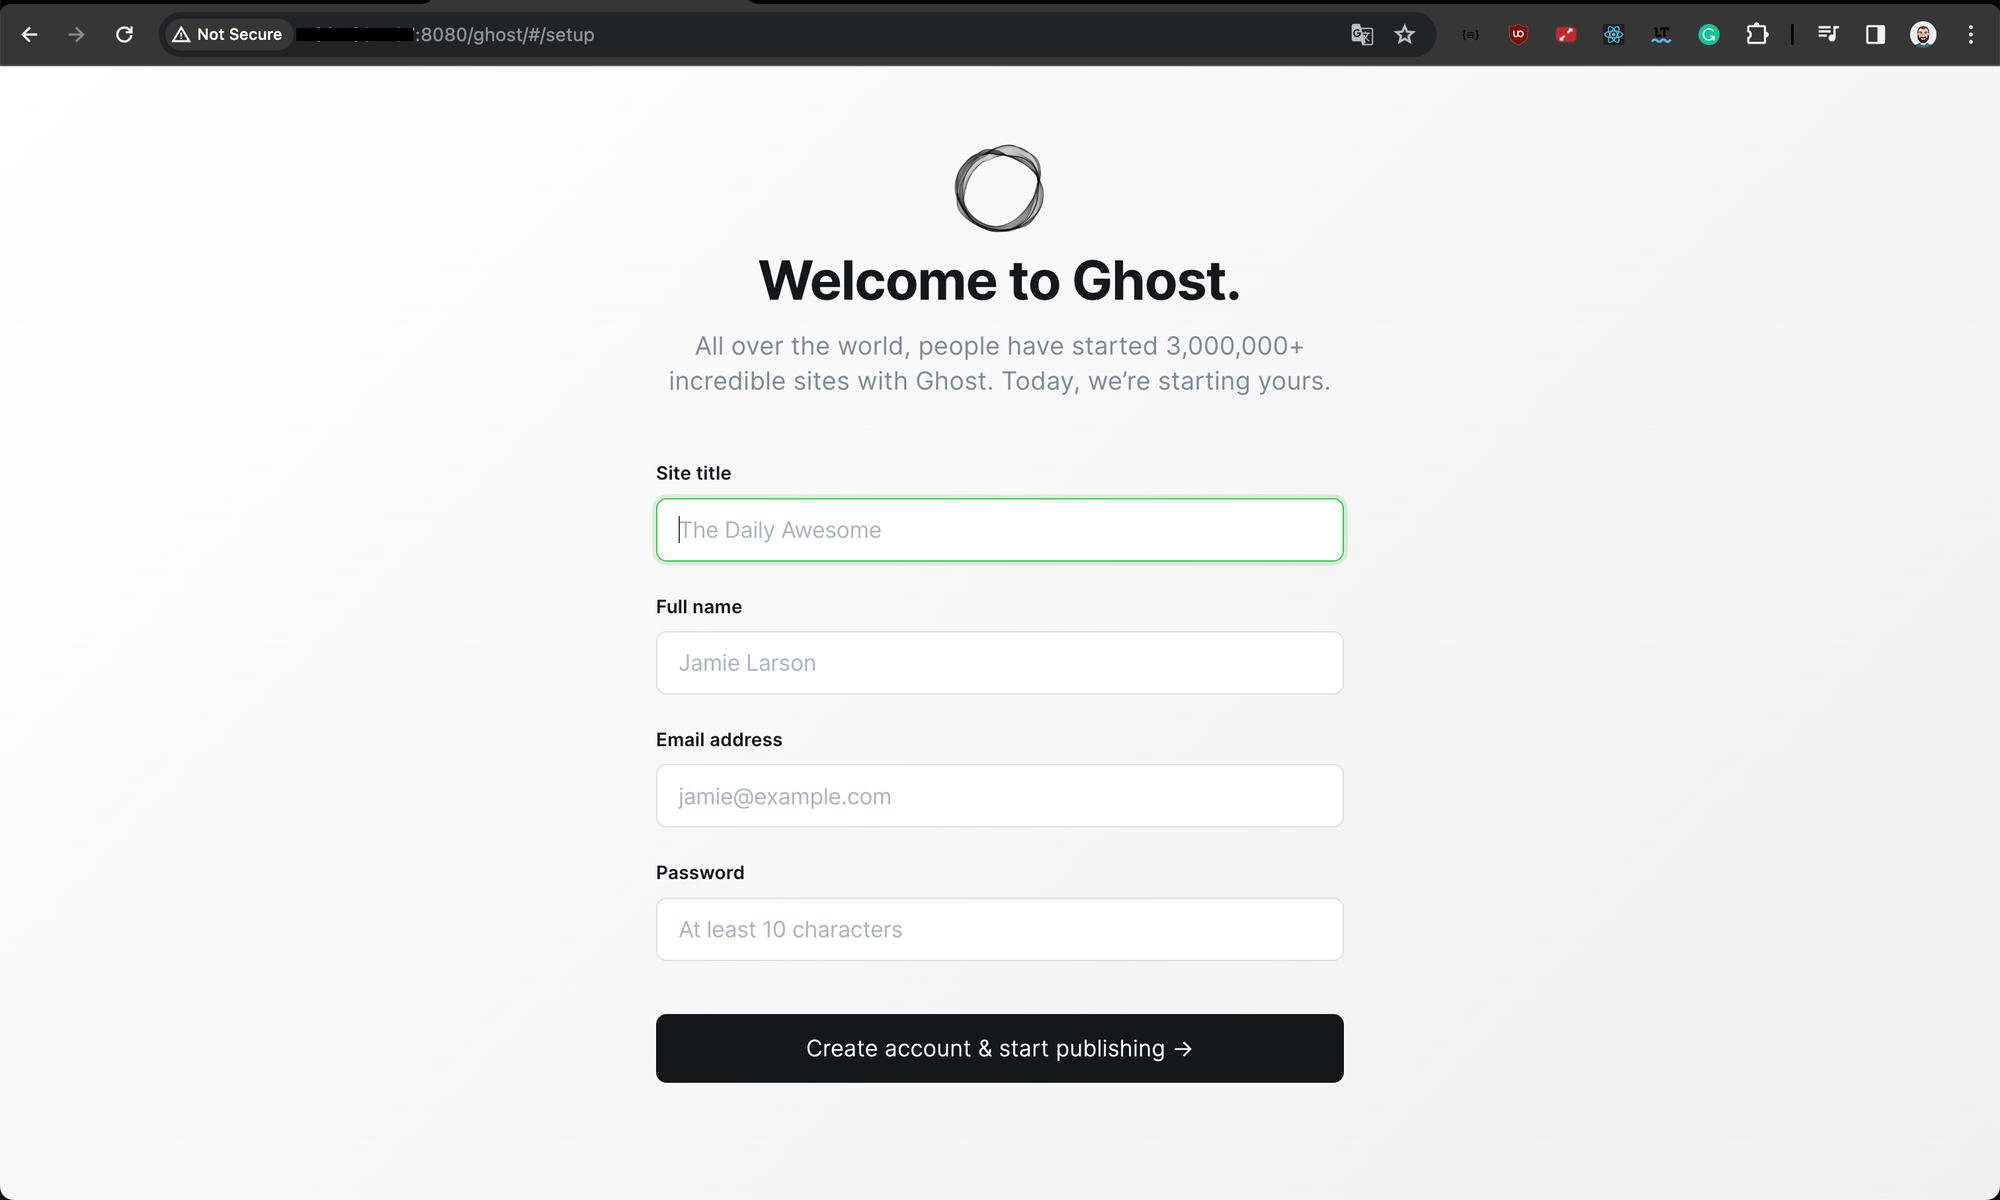
Congratulations, you can now start to customize your CMS and publish content!😄
I hope you enjoyed the article, and will enjoy even more, the next tutorial that will show how to deploy and configure Caddy as Reverse-Proxy.
A tour of portainer capabilities
Docker Standalone agent
A Docker Standalone container is a container that is not part of a Docker Swarm or Kubernetes cluster. Standalone containers are typically deployed and managed on a single Docker host.
Portainer simplifies the management of Docker standalone containers, volumes, and networks, providing a user-friendly web interface for tasks such as creating, starting, stopping, deleting, and monitoring these elements.
Docker Volumes:
Docker Volumes are a way to persist data between Docker containers. They are similar to directories, but they are stored in a way that is not tied to a specific container. Portainer CE can be used to create, manage, and delete Docker volumes.
Docker Networks:
Docker Networks are a way to connect Docker containers together. They allow containers to communicate with each other and share resources. Portainer CE can be used to create, manage, and delete Docker networks.
Logs:
Portainer CE offers a centralized location for managing container logs, enabling you to view and analyze logs for individual containers or groups of containers. You can configure automatic log tailing to continuously display the latest log entries, and set up notifications to be alerted when specific events occur, such as container crashes or the appearance of critical log messages.
Stats:
Gain valuable insights into container performance by accessing real-time container stats, including CPU usage, memory usage, network traffic, and disk usage. You can filter stats by container or group to compare performance across different containers or groups. Additionally, set up notifications to be notified when container stats exceed defined thresholds, ensuring you are proactively alerted to potential performance issues.
Shell Access:
Empower yourself with direct access to the shell of running containers using Portainer CE's built-in terminal. Execute commands, debug issues, and manage resources within the container directly from the platform. Additionally, access the shell of stopped containers to recover data or troubleshoot further if necessary.
Custom registry:
Adding a custom registry to Portainer allows you to manage and deploy container images from a registry that is not natively supported by Portainer. This can be useful for using private registries or registries that require authentication.
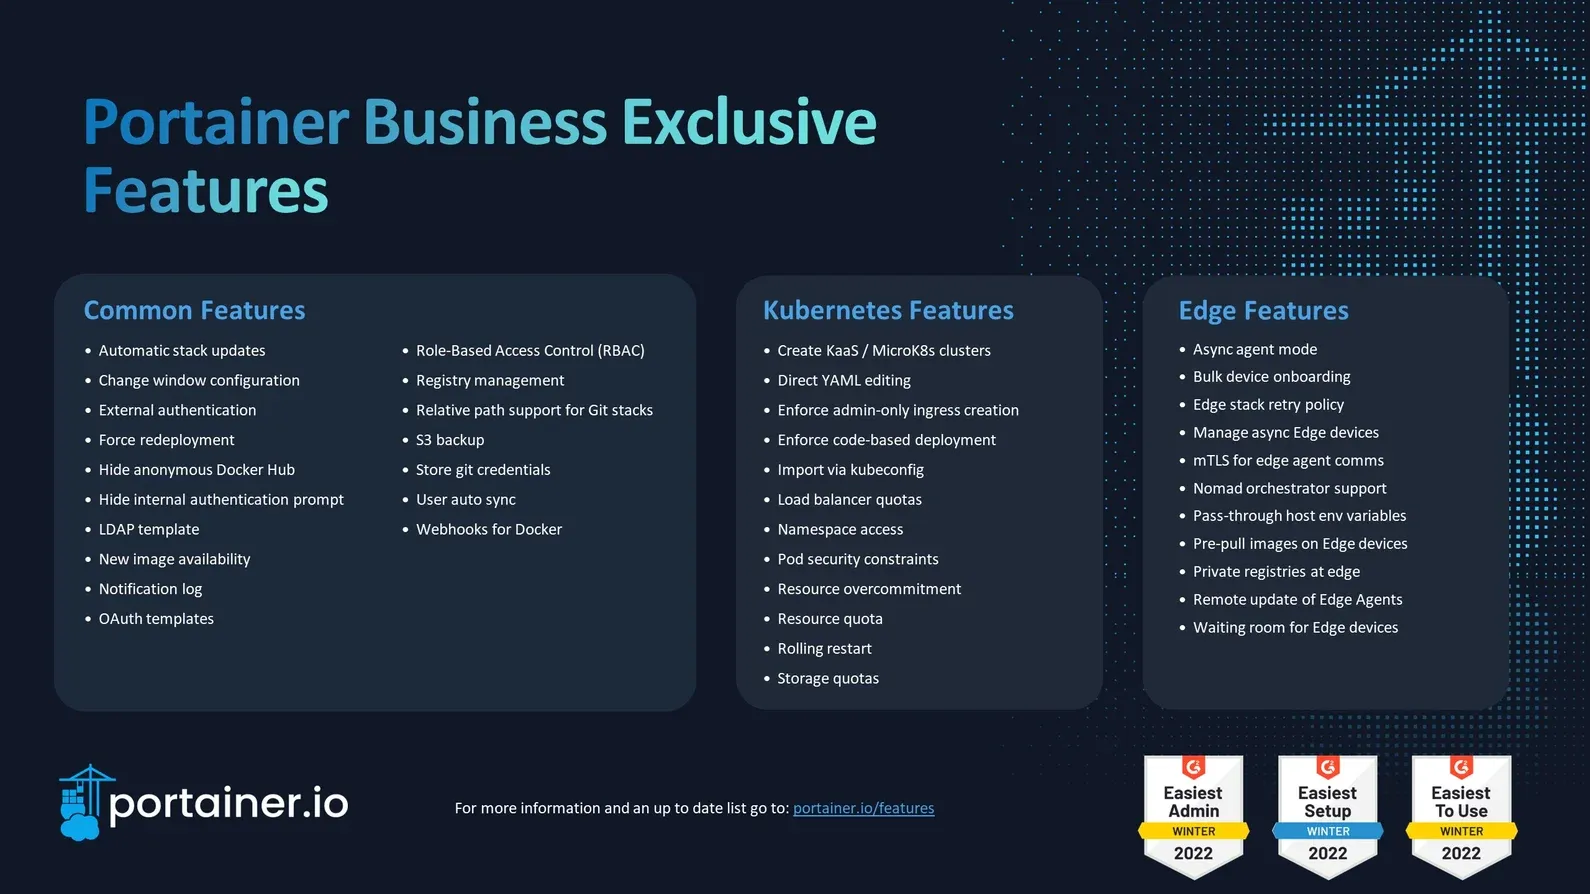
Portainer Business edition
The following image shows what are the Portainer Business features offers (source):
Difference between custom templates and stacks
Custom templates are like pre-built blueprints for applications, defining the base configurations for containers and their settings. They are ideal for deploying similar applications across multiple environments, ensuring consistency and streamlining the deployment process. Custom templates are portable and can be shared seamlessly between environments, reducing the need for manual configuration and ensuring a unified experience across all environments.
Stacks, on the other hand, are more like specific deployment plans tailored to a particular environment. They provide a more fine-grained control over the deployment process, allowing you to customize configurations and adjust settings to meet the specific requirements of the environment. Stacks are not portable and are tied to the environment they are created for, making them suitable for deployments where unique environment-specific configurations are required. But as you have seen during this tutorial, stacks can be created from custom templates
In short, custom templates are ideal for defining reusable configurations and ensuring consistency across environments, while stacks are better for deploying applications with unique configurations specific to each environment.
Here's a table summarizing the key distinctions between custom templates and stacks:
| Feature | Custom Templates | Stacks |
|---|---|---|
| Primary Purpose | Defining base configurations for applications (high reusability) | Deploying applications with unique configurations (low reusability) |
| Usage Scenarios | Deployments with consistent base configurations (multiple environments) | Deployments with unique environment-specific configurations (single environment) |
| Can be created from | web editor, upload from file, Git repo | web editor, upload from file, Git repo, Custom templates |